 Print
Print Setting up The Social Proof Website Live Count Notification
Social Proof notifications are a means of showing evidence that other people are engaging with your website, product, or service. However, in the case of the Live Count widget, it serves as a website traffic indicator. That’s classic social proof: people feel safer and more confident when they see others doing the same thing.
When logging into the Fomo Dashboard on SEO Web Analyst, I believe you have followed similar steps in How To Set up Website Fomo Notifications to set up your Live count notification.
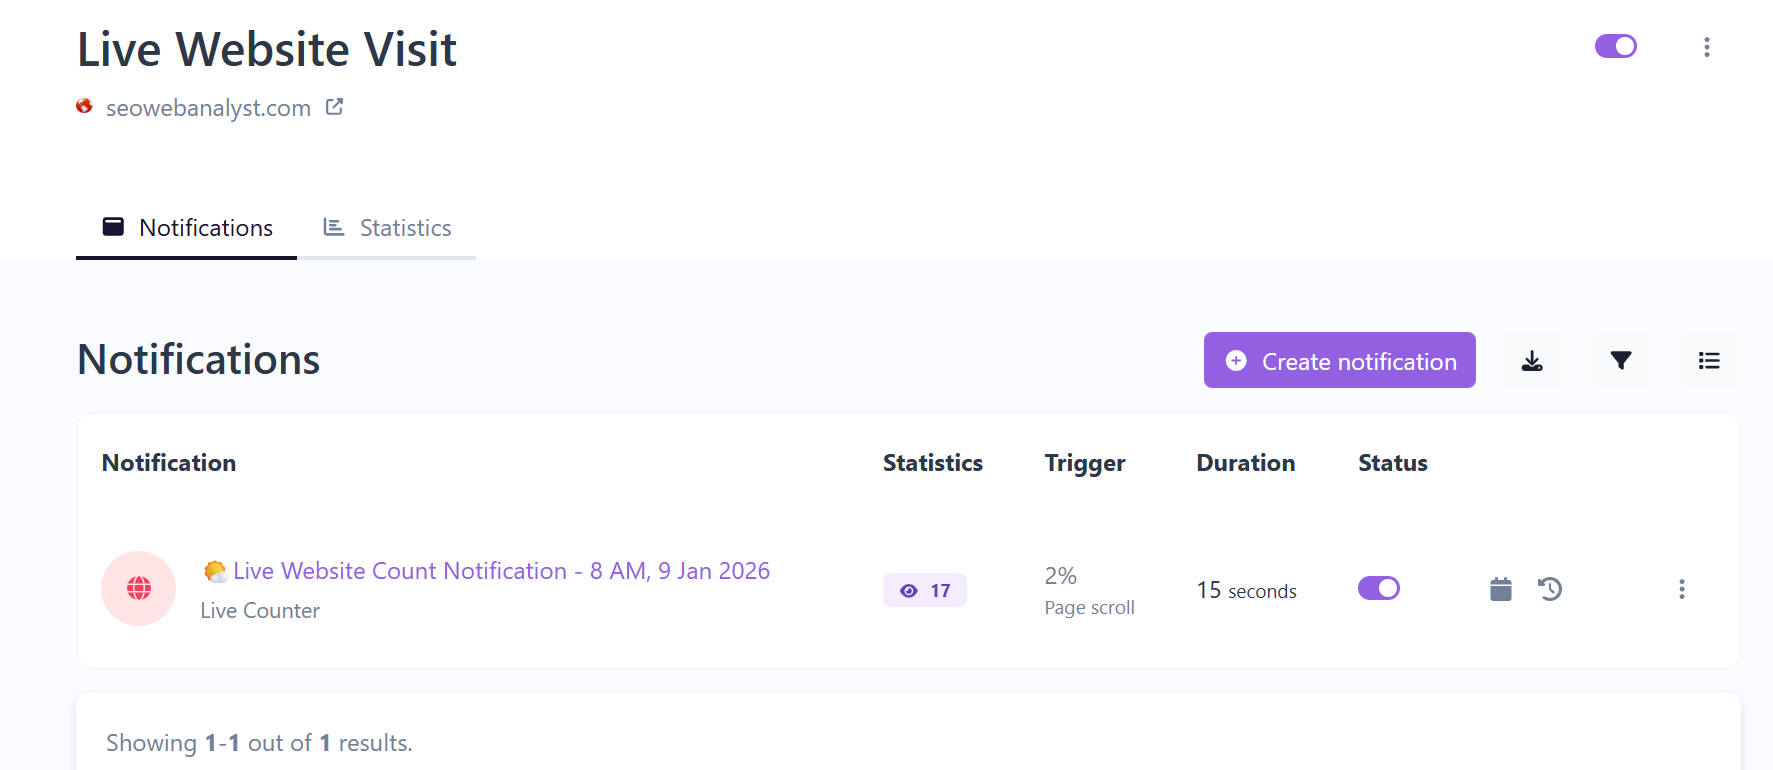
Now, at this stage, when you have gotten your fomo pixel for the live notification, there is a professional method you can use to have the widget display on all of your website pages. This method includes using Google Tag Manager to control where the pixels are rendered. The benefit of this method is that it fires on all pages where you have your Google Tag Manager installed already, and you can easily add more FOMO pixels into the container and publish.
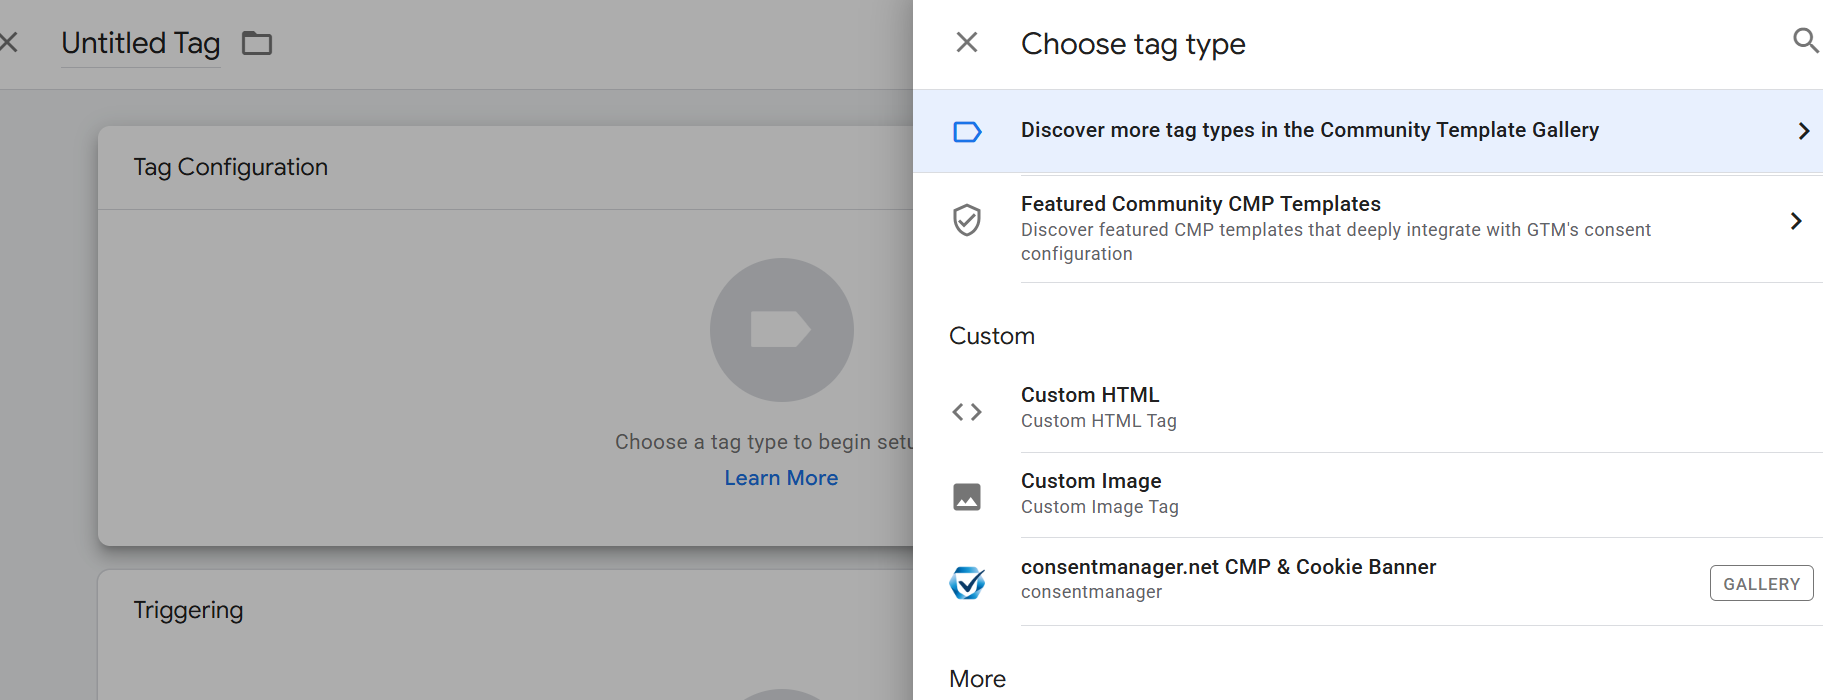
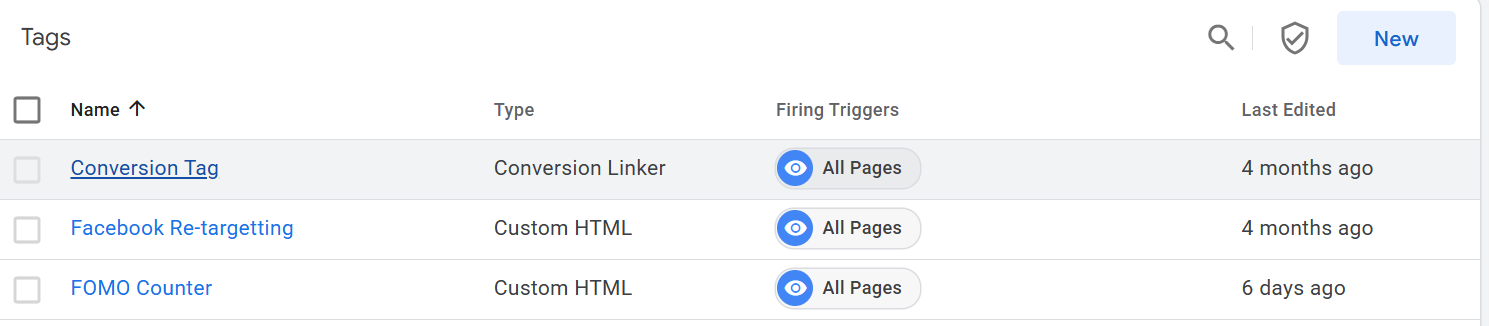
Simply create a new tag and click on the new button, name the configuration, and on the tag configuration card, click on it. Next, you select custom HTML, and for the trigger card, select all pages.
Next, you need to set your main settings and triggers correctly. Follow the image below to set up your own system. Fill in the information with your own settings.
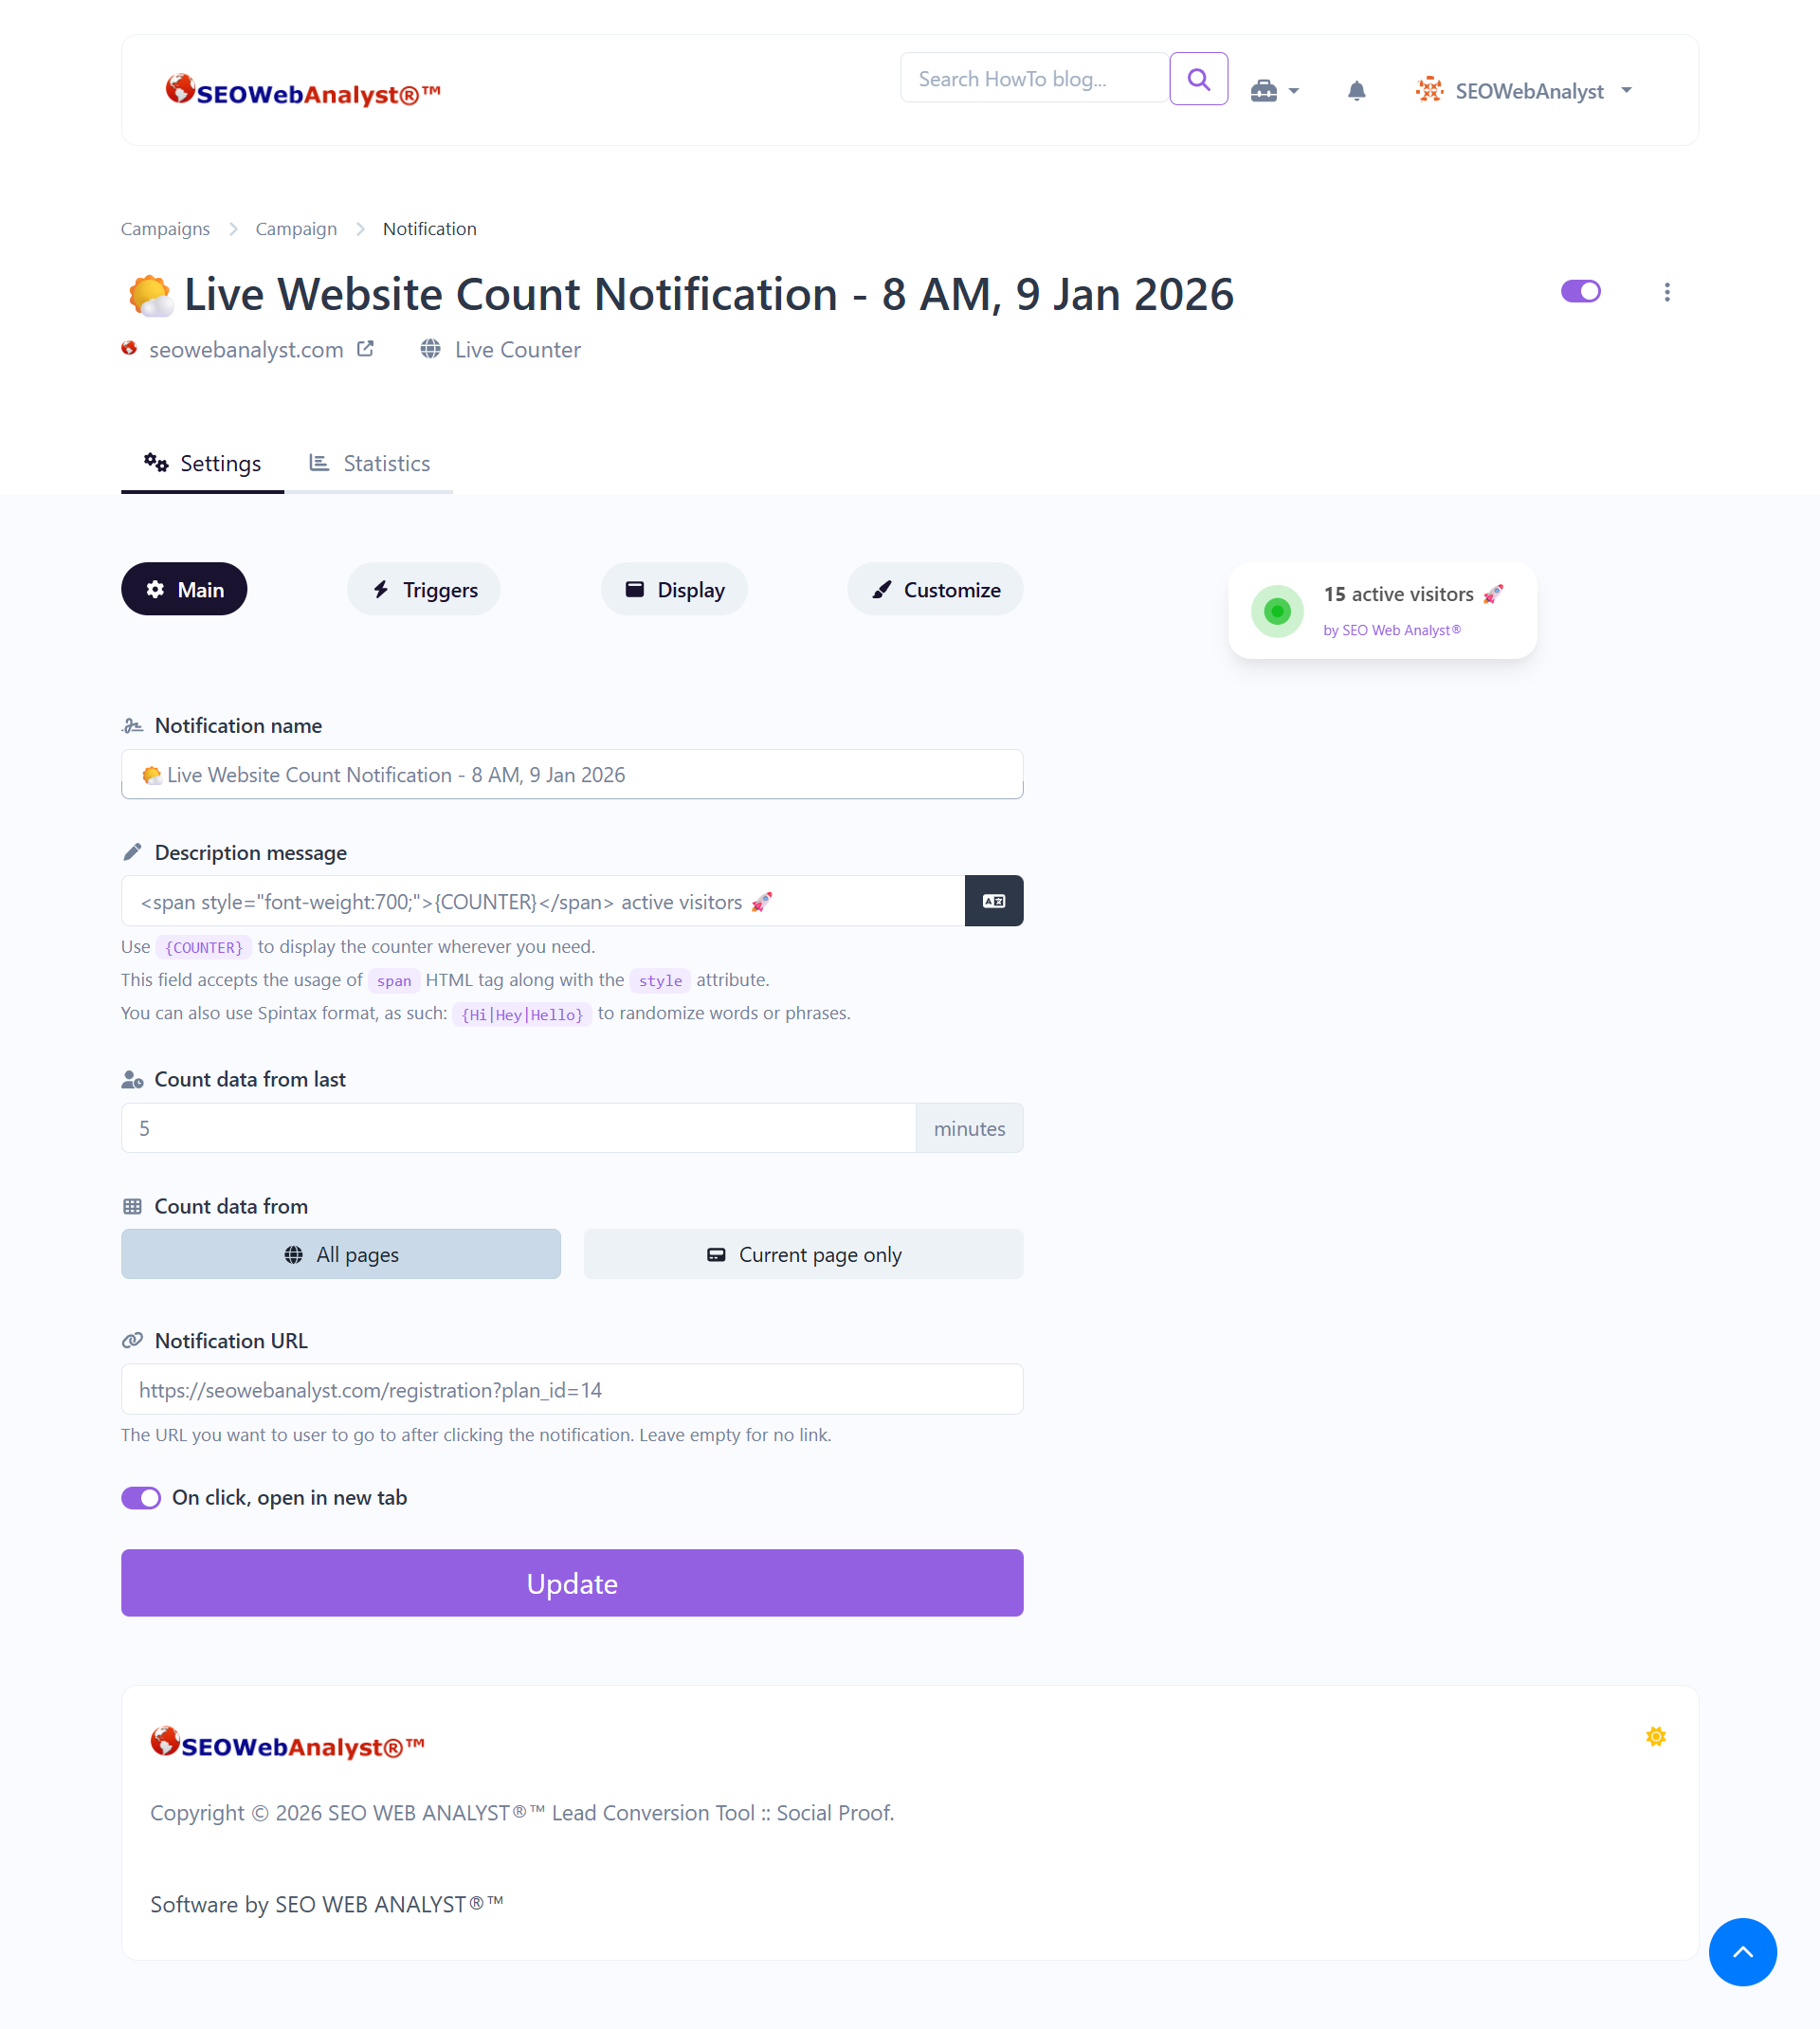
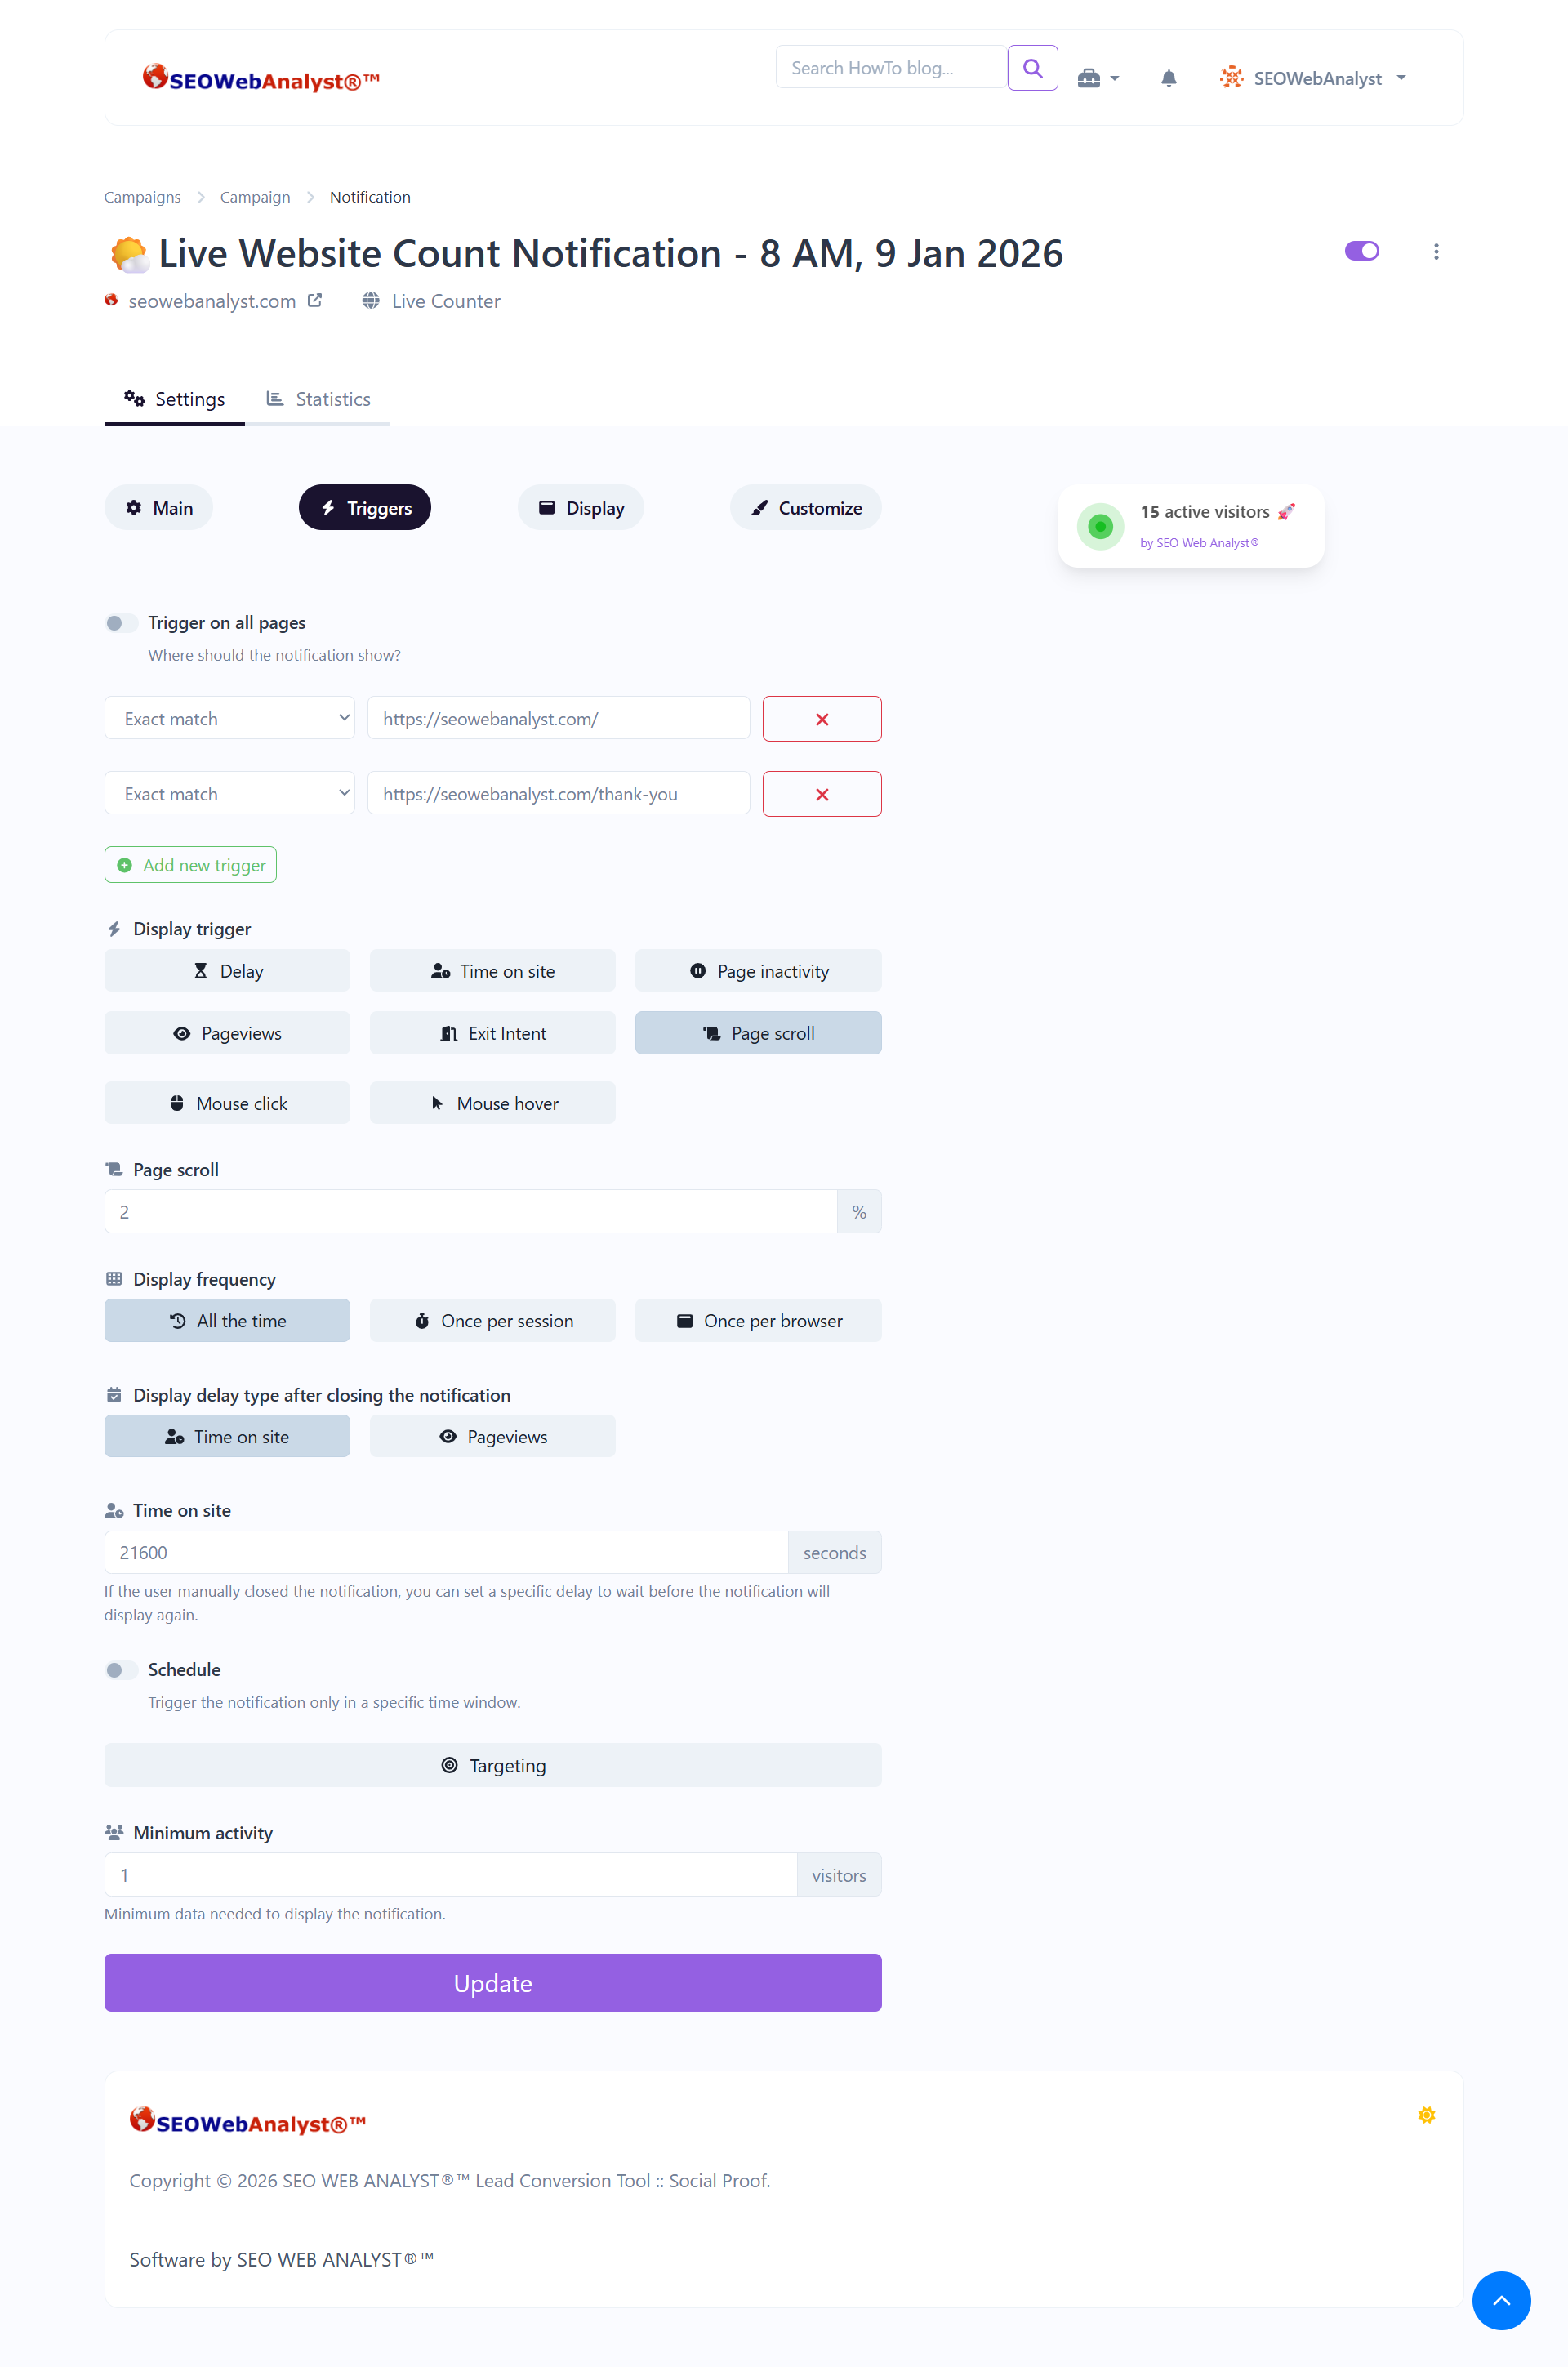
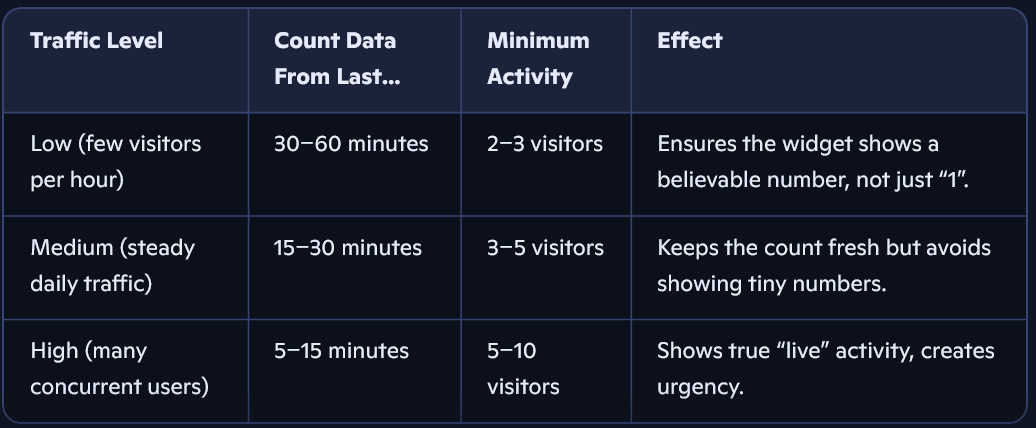
Depending on how you set up your triggers and Minimum activity, Minimum data is needed to display the notification. Count the data from the last X minutes. The following describes what they mean and how they can impact your Live Count Notification behavior.
1. Triggers
• These control when the notification appears (e.g., after a delay, on exit intent, after scrolling, etc.).
• If the trigger conditions aren’t met, the notification won’t show — even if visitors are present.
2. Minimum activity
• This is the threshold of visitors needed before the notification can display.
• Example: If you set it to 3, the widget won’t show unless at least 3 visitors are active in the chosen time window.
• If it’s set to 1, the widget will show as long as there’s at least one visitor.
3. Count data from the last X minutes
• This defines the time window for what counts as “active.”
• If you set it to 30 minutes, the system will include all visitors who have been active in the last 30 minutes.
• Shorter windows (like 5 minutes) only show truly live visitors, which can look low if traffic is sparse.
• Longer windows (like 30 minutes) make the number bigger and more stable, because it includes recent visitors who may not still be on the page.
How they work together
• Triggers decide when the widget fires.
• Minimum activity decides if the widget fires (based on visitor count).
• Count data from the last X minutes decides how many visitors are counted.
So if you set:
• Trigger = “On page load”
• Minimum activity = 3
• Count data from last = 30 minutes
➡ The widget will only appear when the page loads if at least 3 visitors have been active in the last 30 minutes.
The image table below shows the best time to set up these data metrics correctly.